
































and attractive offers
cost-effective
and money back guarantee
customer service
Free gifts
Article details
Icon Airflite, Pinlock lens ProtecTint
Article No.: 11056144
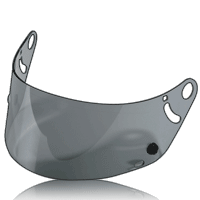
ProtecTint® - From clear to light smoke in a matter of seconds.The Pinlock ProtecTINT insert lens react to UV light by darkening its tint color automatically while keeping your helmet face shield fog-free at the same time.
The Pinlock® visor insert is made out of a material that contains moisture absorbing properties, which reacts like a sponge and absorbs moisture effectively.The inner part of the Pinlock® is lined with a silicon bead, which creates a double glazed window type of effect when the Pinlock® visor insert is attached to the helmet visor. The pocket of air that is trapped in between the visors acts as an insulator for the inside temperatures in the motorcycle helmet. Efficient absorption properties combined with the double glazed like feature, the Pinlock® visor insert is the most effective, durable and affordable anti-fog solution on the market.
How to install
Step 1
The Pinlock® FliteShield™ Insert Lens only works with Pinlock® Ready FliteShields™ (Sold Separately) available in Clear, Dark Smoke, Light Smoke, and RST Silver.
Step 2
Remove the helmet shield from the helmet. Flex the helmet shield and place the Pinlock® lens between the two pins provided in the helmet shield. Once installed, remove protective film.
Step 3
Inspect the silicon seal on the Pinlock® lens. It must make full contact with the helmet shield in order to avoid any condensation forming between the helmet shield and the Pinlock® lens. If correct, re-install your helmet shield.
Step 4
If the silicon seal does not make full contact with the helmet shield you can adjust the pressure by turning the outside screw counter clockwise using the outside arrow in the pin for reference. Once finished, re-install your shield.
Here you find some information about Pinlock Anti-Fog lenses
Suitable products


Customer reviews
You've had experience with the product?